

This page provides a look at the process involved in creating the final Visual Solution based off the research.
Through the research conducted in Chapter 2 of this thesis, it became clear that the problem of shelter cat overpopulation was a result of multiple factors, with the influx of cats entering shelters far outpacing the rate of adoption. Too many feral and stray community cats are being brought into shelters by people who think they are doing a good thing for these cats, when in fact they might be handing those cats a death sentence if they can’t find a good home. Conversely, cats sitting in shelters waiting to be adopted are affected by a wide range of factors that directly impact their chance at finding a home.
To address this issue from both ends of the shelter cat process—from intake to adoption—I determined that the best and most prudent course of action would be to arm animal welfare professionals with greater knowledge, understanding, and potential strategies for improving the flow of cats in and out of shelters. This is where the idea of the Shelter Cat Advocacy Tool Kit comes in: a targeted awareness and education kit meant to shed light on programs, strategies, and information that have the potential to improve the flow of cats through shelters. The Tool Kit had to meet a variety of needs, such as being professional enough to garner serious attention, but also to invoke a sense of empathy and desire to help these animals. Therein was the problem: how do I accomplish that? What form does such a kit take? And what assets would I need to develop to achieve the desired effect? This chapter looks at the process involved in the development of this Tool Kit.
PROJECT SYNOPSIS
Given the need for a kit meant to provide professionals with further awareness, understanding, and potential strategies, the solution I chose was the Shelter Cat Advocacy Tool Kit. But who would I be targeting? On the individual level, the Tool Kit is aimed at people who manage and aid shelter cats through all stages of the intake and adoption process. This includes shelter managers, staff, and volunteers. It also includes those who work with animals but are not necessarily a part of a shelter, such as veterinarians, animal control specialists, etc. Institutionally, the Tool Kit is aimed at organizations who advocate, care for, and oversee the aid of cats, namely municipal and national animal shelters, cat advocacy groups, and veterinarian clinics. All these groups have vested interests in the care and lives of shelter cats, making these organizations and the people who work with them the primary audience.
TARGET AUDIENCE

DESIGN SCOPE
With my audience selected and a direction I needed to go, it became clear that establishing the full scope of the kit was required. What would go into the kit and what would those assets say?
The Shelter Cat Advocacy Tool Kit is meant to impart knowledge to professionals, offering insights both new and old to those who might be overlooking something that could help them aid cats. The kit had to be something that could be handed out to professionals, such as at conferences or even in person-to-person meetings, in a simple and effective way. To do this, the content should fit in a bag or some other easy-to-carry container. From this point I deduced that a variety of items that could be effortlessly handled would be the best approach due to the physical and interpersonal nature of the kit.
As the problem facing animal shelters is both the number of cats arriving and leaving, the items in the Tool Kit should address each side of the equation. The information should also be relevant and accessible to anyone handed the tool kit, whether that person be a professional veterinarian or a local shelter volunteer. The information should be understandable to a wide range of knowledge bases, thus the need for content that could speak to a diverse group was required. As such, I concluded that the following items would be created as part of the Shelter Cat Advocacy Tool Kit:
Trap-Neuter-Return Fact Book & Guide: A reference guide in the form of a short book that contains useful and pertinent facts regarding what TNR is and the steps involved in the process.
Trap-Neuter-Return Doorhangers: Paired with the TNR Fact Book, these doorhangers could be utilized by shelters and volunteers to be placed on the front doors of homes in target areas for any TNR programs conducted for the purpose of providing community information and awareness.
Blinking & Clicking Strategy Posters: A set of posters would illustrate two methods for potentially improving the behavior and trust of anxious, timid, lethargic, or otherwise unsociable cats.
Adoption Risks Trifold: A fact-based brochure meant to educate shelter workers, veterinarians, and volunteers that discusses a variety of prominent risk factor negatively cats’ adoptions.
Gear for Humans: For people to show their support for community and shelter cats in the form of fun gear for recipients to enjoy including a t-shirt, cofee mug, socks, and pens.
Gear for Cats: Cats themselves can also show support for each other by enjoying a handful of items curated for them, such as a cat collar, mouse toy, and catnip ball.
Resource Web Page: Most items will have a scannable QR code that will take viewers to a resource website that imparts knowledge on the content contained within the assets of this kit.
Tool Kit Package: Finally, the kit would not be complete without a storage package. This will take the form of a tote bag with a customized image or branding to advertise support of shelter and community cats.
One final piece was missing from the kit: something to unify the designs and provide an umbrella that all the content within would fall under. I felt it would be important to create a hypothetical brand to connect all these materials under a single banner. The purpose of the brand would be to promote cat welfare and adoptions, with the intent that it be a major advocacy group for cats around the world. With this hypothetical brand, the rest of the content could follow similar design themes and styles, using the brand’s style guide as a resource for color and font choices.
HYPOTHETICAL BRAND
To get started, I needed a good name for the hypothetical brand. I decided that the brand’s name should indicate that it cares about cats living both on the streets and housed in shelters or foster care. Existing brands such as Alley Cat Allies deal with all aspects of cats’ lives, but as their name suggests they are more specifically focused on the safety and welfare of community cats. Organizations such as the ASPCA are focused on cats housed within shelters, while organizations like iHeartCats covers all aspects. My intention with this hypothetical brand is that—much like iHeartCats—it will split its focus between cats living on and off the streets. It was also important to me that the brand’s name be easy to remember, whether by keeping it simple or by using alliteration to have it stick in people’s minds. I began with a word list and pared it down to a few ideas. In the end, I decided to go with the name “Stray & Stay Cat Coalition”, or “Stray & Stay” for short. From there, I took to sketching out some logo ideas in thumbnails and eventually into Roughs (seen below).


Now that all the sketching and brainstorming was completed, it was time to develop the hypothetical brand, Stray & Stay Cat Coalition, so that I could use it as a guide for the rest of the content in my deliverables. Before I began creating the logos in Illustrator, I spent some time experimenting with different color palettes and font pairings. After a couple hours’ worth of changing ideas, I settled on a few but would hold out my final judgments until I created the logos themselves.
Since I couldn’t decide between thumbnails #14 and #25a/b, I decided I would make each version in Illustrator. I knew it would be more work for me, but I needed to see the results with my own eyes before making a final decision. I placed the roughs into Illustrator and go to work creating the vector versions of each design, starting with thumbnail/rough #14 and eventually moving to #25 once that one was completed. #25 took a great deal more time to complete than the previous one, mostly due to its more complex design. Much like the previous version, I used a series of simple shapes to build the overall design of the mascot-type logo, including the heart shape, cat’s head, ears, paws, nose, and tail.

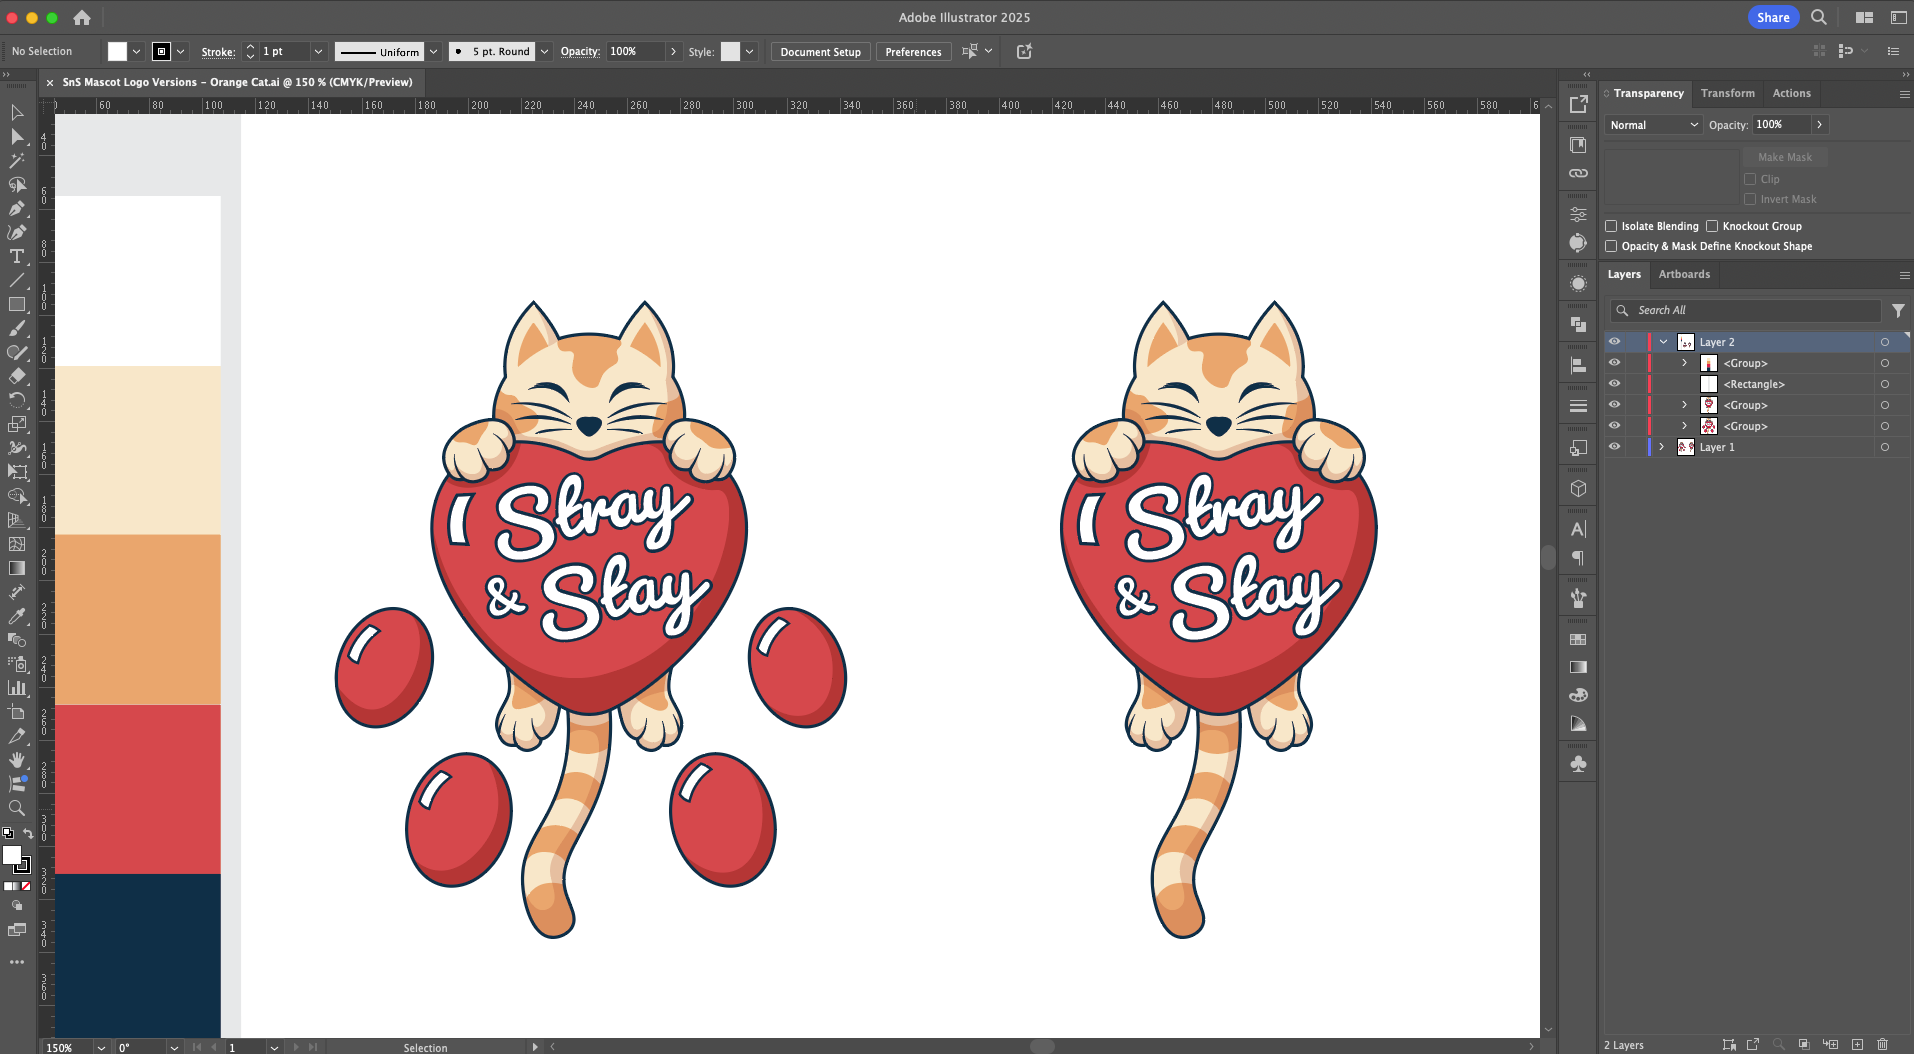
I was happy with my results but undecided about which logo to use: the mascot logo with the cartoonish cat, or the more modern-looking logo? I asked friends and family, and they tended to like the mascot logo better, mostly because they thought it was cute more than because it was an effective answer to my design problems. After considering it further, I concluded that the home/cat/heart logo was my best option to represent my hypothetical brand.
Now that I knew which of the two logos to use, I got to work on a short style guide using Adobe InDesign to flesh out the full look and feel for the brand’s visual identity. The style guide is set up to include an overview of the primary logo and its colors, font choices, and color palette. It also includes a variety of ways to use the logo in different color-matching situations. Now, I was ready to tackle the rest of the deliverables in my project.

TNR Fact Book & Guide
Next up after the hypothetical brand was to begin working on the contents of the Shelter Cat Advocacy Tool Kit itself, starting with the TNR Fact Book & Guide. I chose a 5x7-inch book layout based on the printing options offered, and the fact that this is a common size easily printed by a wide range of printing companies should I need to ever change printers. Additionally, a 5x7-inch book is small and easy to carry around, making it an excellent size for a resource guide such as this guide.
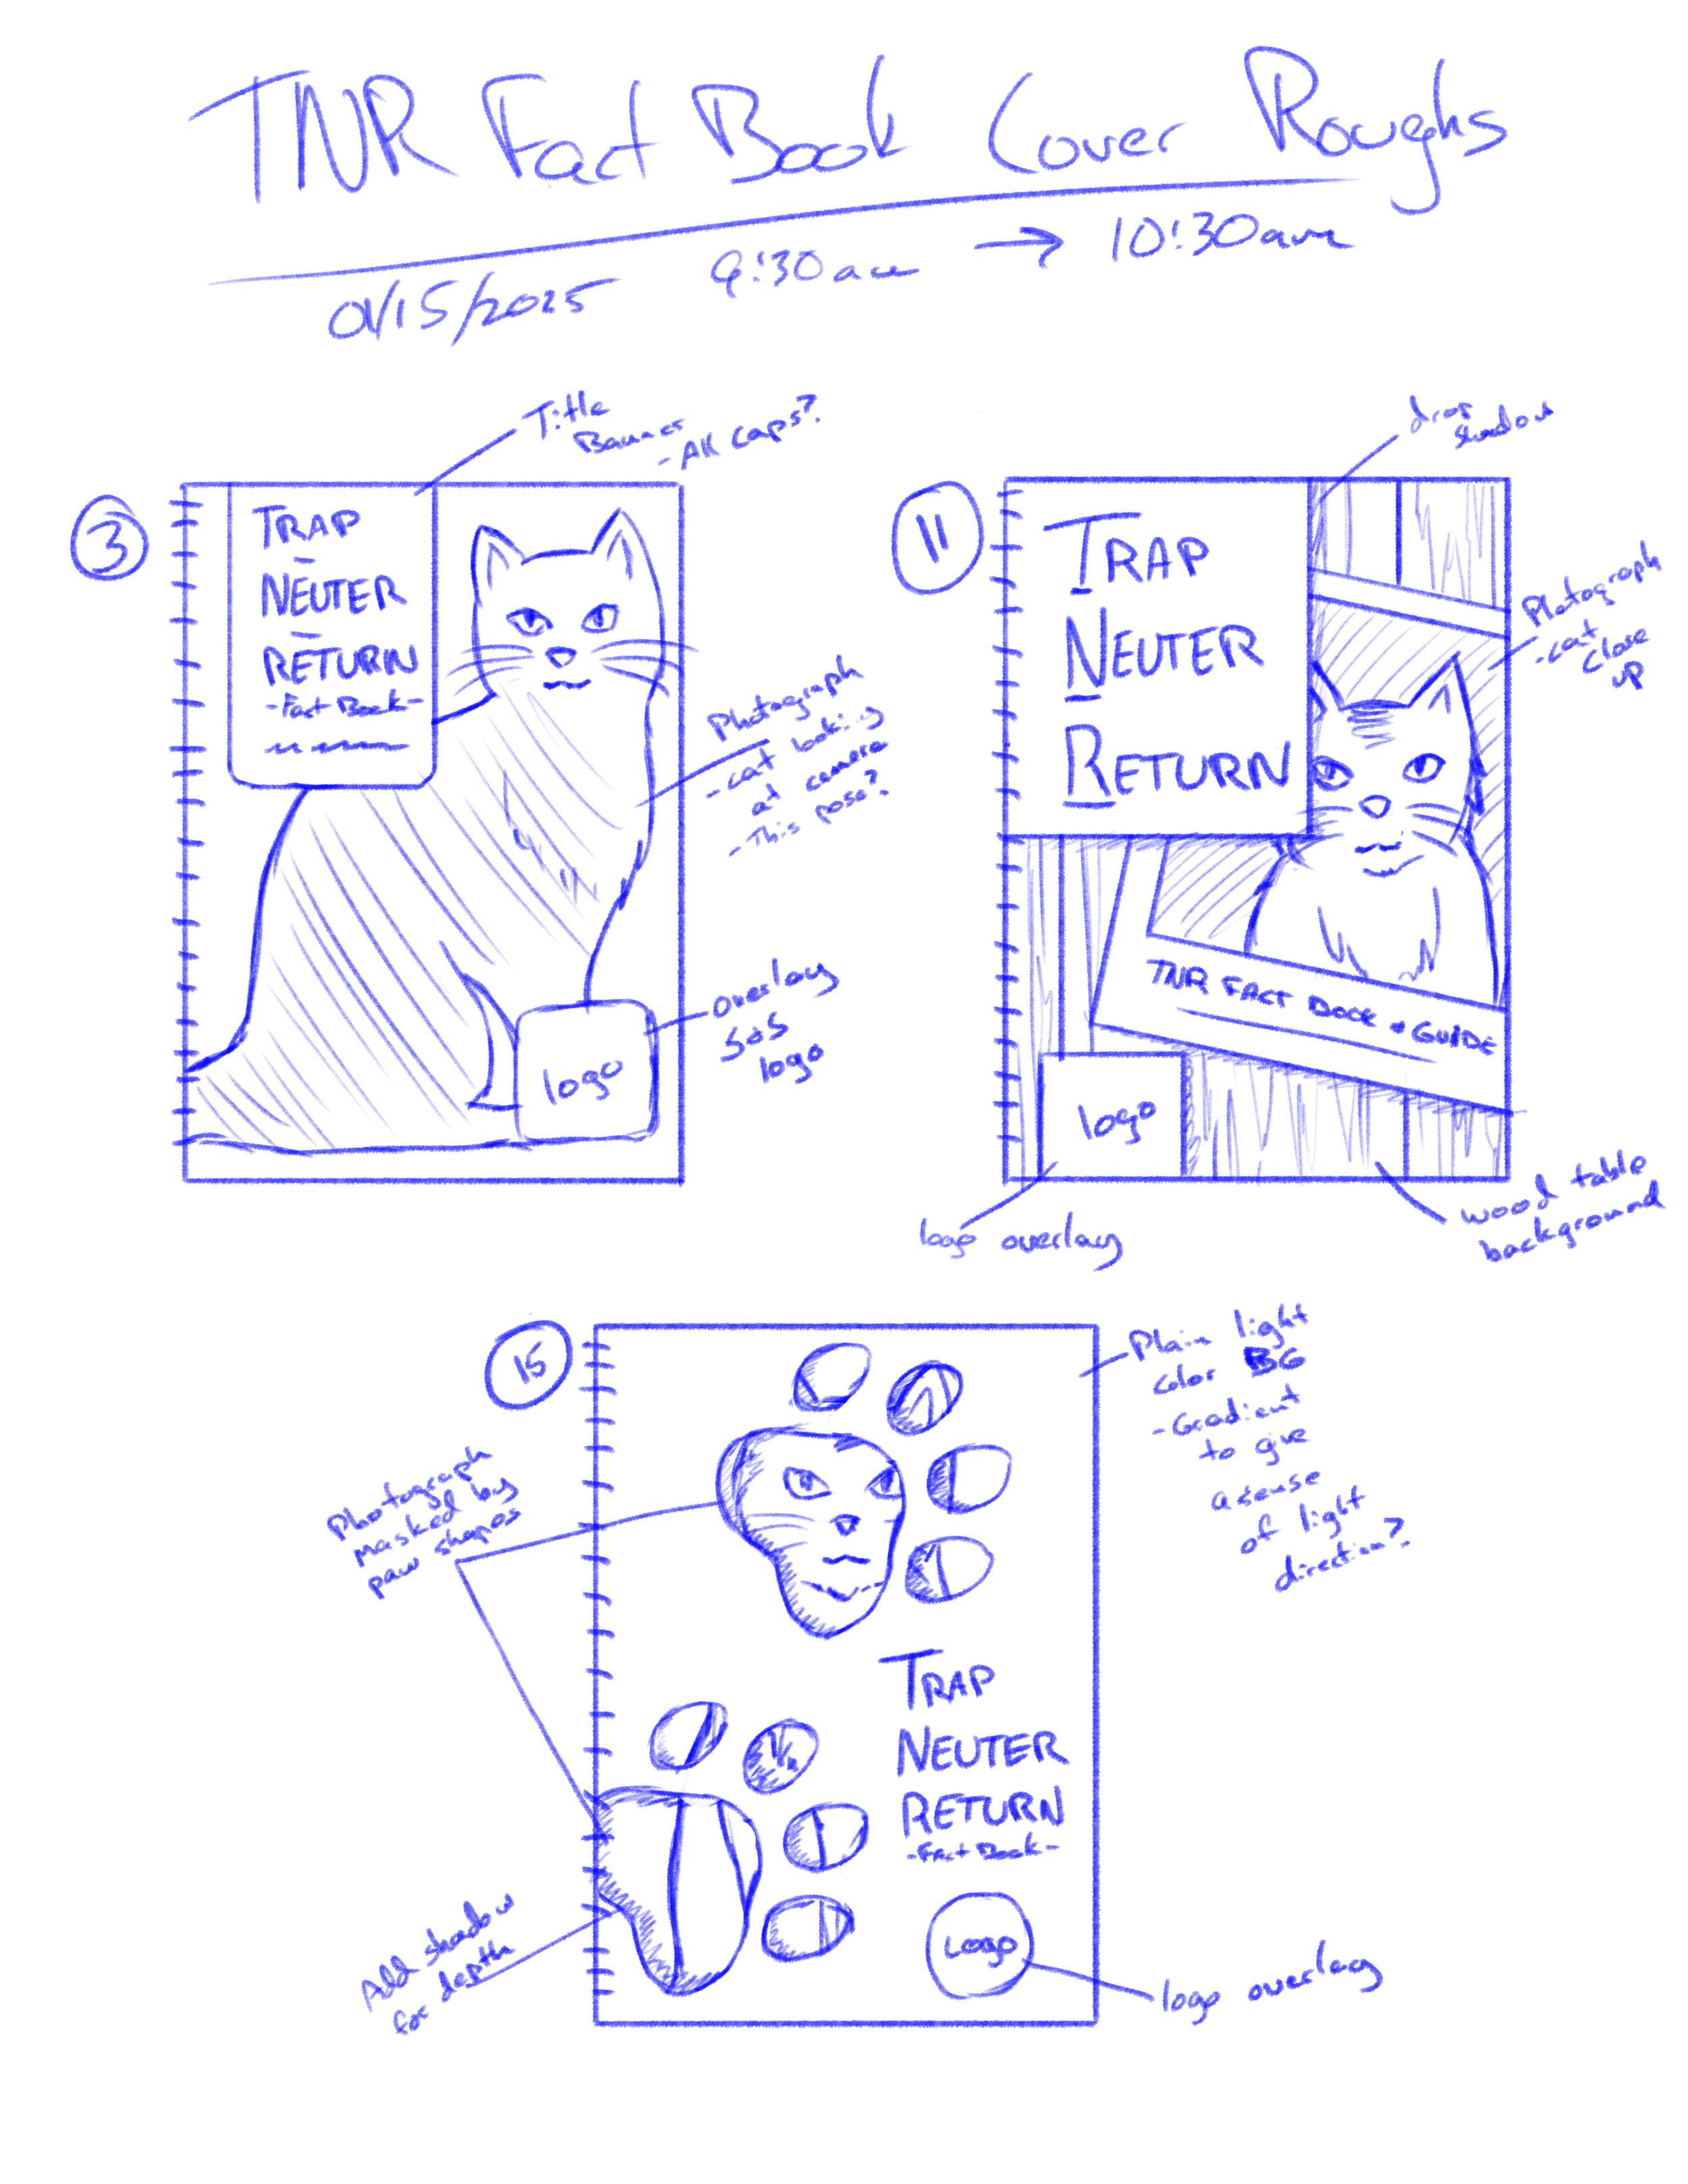
Given the nature of the book as a resource guide, I knew I wanted the cover to be relatively simple and easy to read. I started with a series of thumbnails that range from using single large photographs of cats, to a nostalgia-themed approach utilizing polaroids, etc. I found myself interested in thumbnails #3 for its simplicity and straightforward approach, #11 for using a clean but nostalgia-filled theme using a polaroid as its main visual, and #15 for the use of paw print shapes to create a window-like masked effect that allows readers to see a cat behind those shapes. As such, I took these three thumbnails and completed more detailed sketches to gain a better understanding of how they would look.

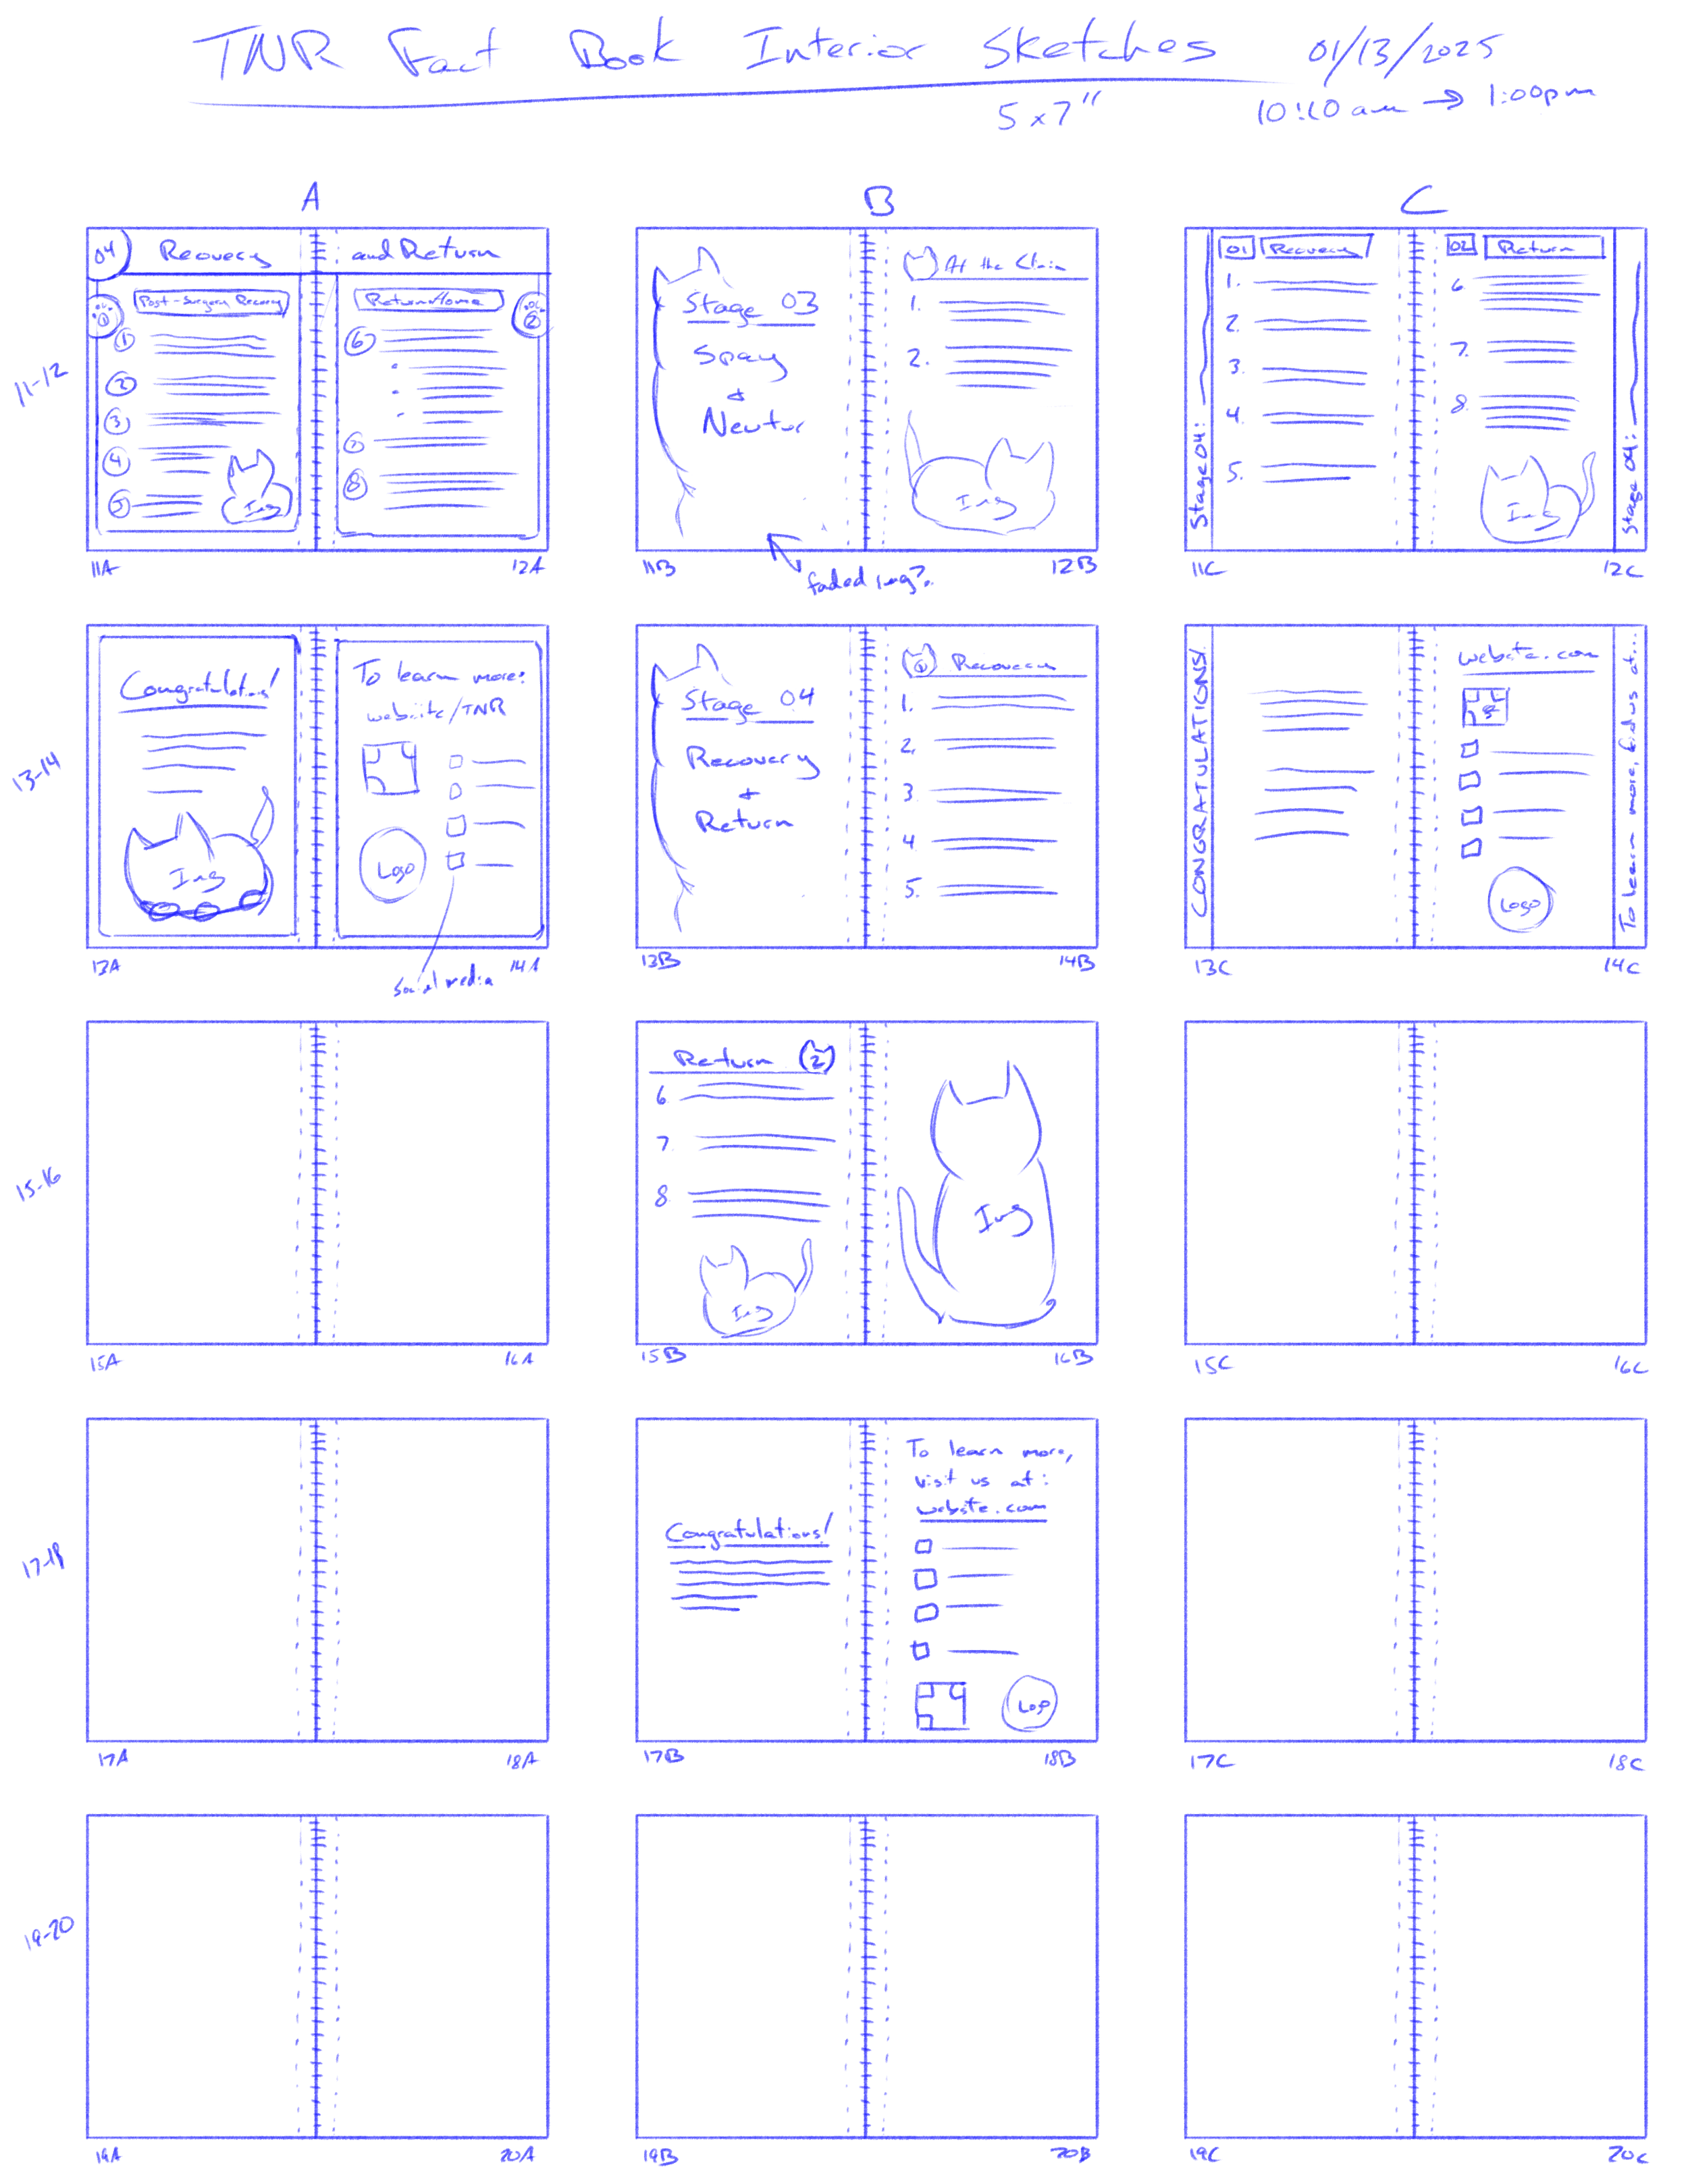
The interior of the book required a different approach, as the designs and layout were heavily dependent on not just aesthetics, but also on written content. I started with the written content, utilizing resources such as Alley Cat Allies and ASPCA to make sure I properly understood the steps involved. I created three sets of thumbnails for the book, laying them out so I could place the anticipated written content appropriately. I wasn’t sure yet how many pages the book would be, but these sketches were meant to be a guide to aid me in the design progress. A major difference between this book and the one created by Alley Cat Allies is that this one would be much heavier on text, while theirs was primarily short facts. As such, the imagery within the TNR Fact Book’s pages will accent and compliment the text rather than be the main draw on each page. Satisfied with my thumbnails, I took to making rough sketches for a handful of spreads using thumbnail set A as my main base and integrating a few elements from options B and C as I saw fit.

With the sketching complete I moved on to the design of the book itself, using Adobe InDesign to lay out the entire book including cover and interior pages. I set up the document according to the standards of the printing company I had found, which included bleed and margins. Now it was time to design, but I needed imagery to work with, including a wooden backdrop for the polaroids to sit against as if it were a tabletop of some kind.
I took photographs from around my home such as the back porch, some wooden floor paneling, a table in my dining room, and even a drawing board I use for sketching on. I found I liked the look of the drawing board the best, and after some lighting and color balance adjustments in Photoshop I moved the image into InDesign for the backdrop.
Next was the polaroids themselves. I didn’t have any polaroid templates to use so I moved into Photoshop to make my own. I also realized I needed some good, crumpled paper textures to give the polaroids a used or worn look to them, so I took some crumpled computer paper and took photographs of them unfolded and used these as the textures for the templates. From here I created a black square to act as the frame for the photos I intend to use. Over the years I’ve amassed quite the collection of cat photographs, and it took me quite some time to sift through them all to decide which ones I would likely want, not just for this project, but for the other deliverables in my thesis as well. One after another I exported a variety of polaroid images to use and started placing them in InDesign.


At first, I followed the design I had laid out in the rough sketch, using a single polaroid of a community cat in my area alongside the back of another polaroid where the title of the book is placed. The logo then was placed in the bottom of the cover in a small frame. I immediately encountered a problem, since I wasn’t happy with the results. It looked bland and uninteresting to me, and I found the empty spaces distracting. I needed to do something about it but couldn’t figure out what. By this point I had spent a great deal of time on the project, so I decided to come back to it the next day.
Returning to the project the day after was a good decision as I was able to come back to it with a clear head. I needed to veer away from my original design decisions slightly by adding in additional polaroids behind the title and main photograph, adjusting the position and rotation of each one to give the cover a look that came across as if someone were spreading these photographs on a table to reminisce over. This allowed me to place and position locations for the logo, QR code, and brief “about” alongside the hypothetical brand’s website.


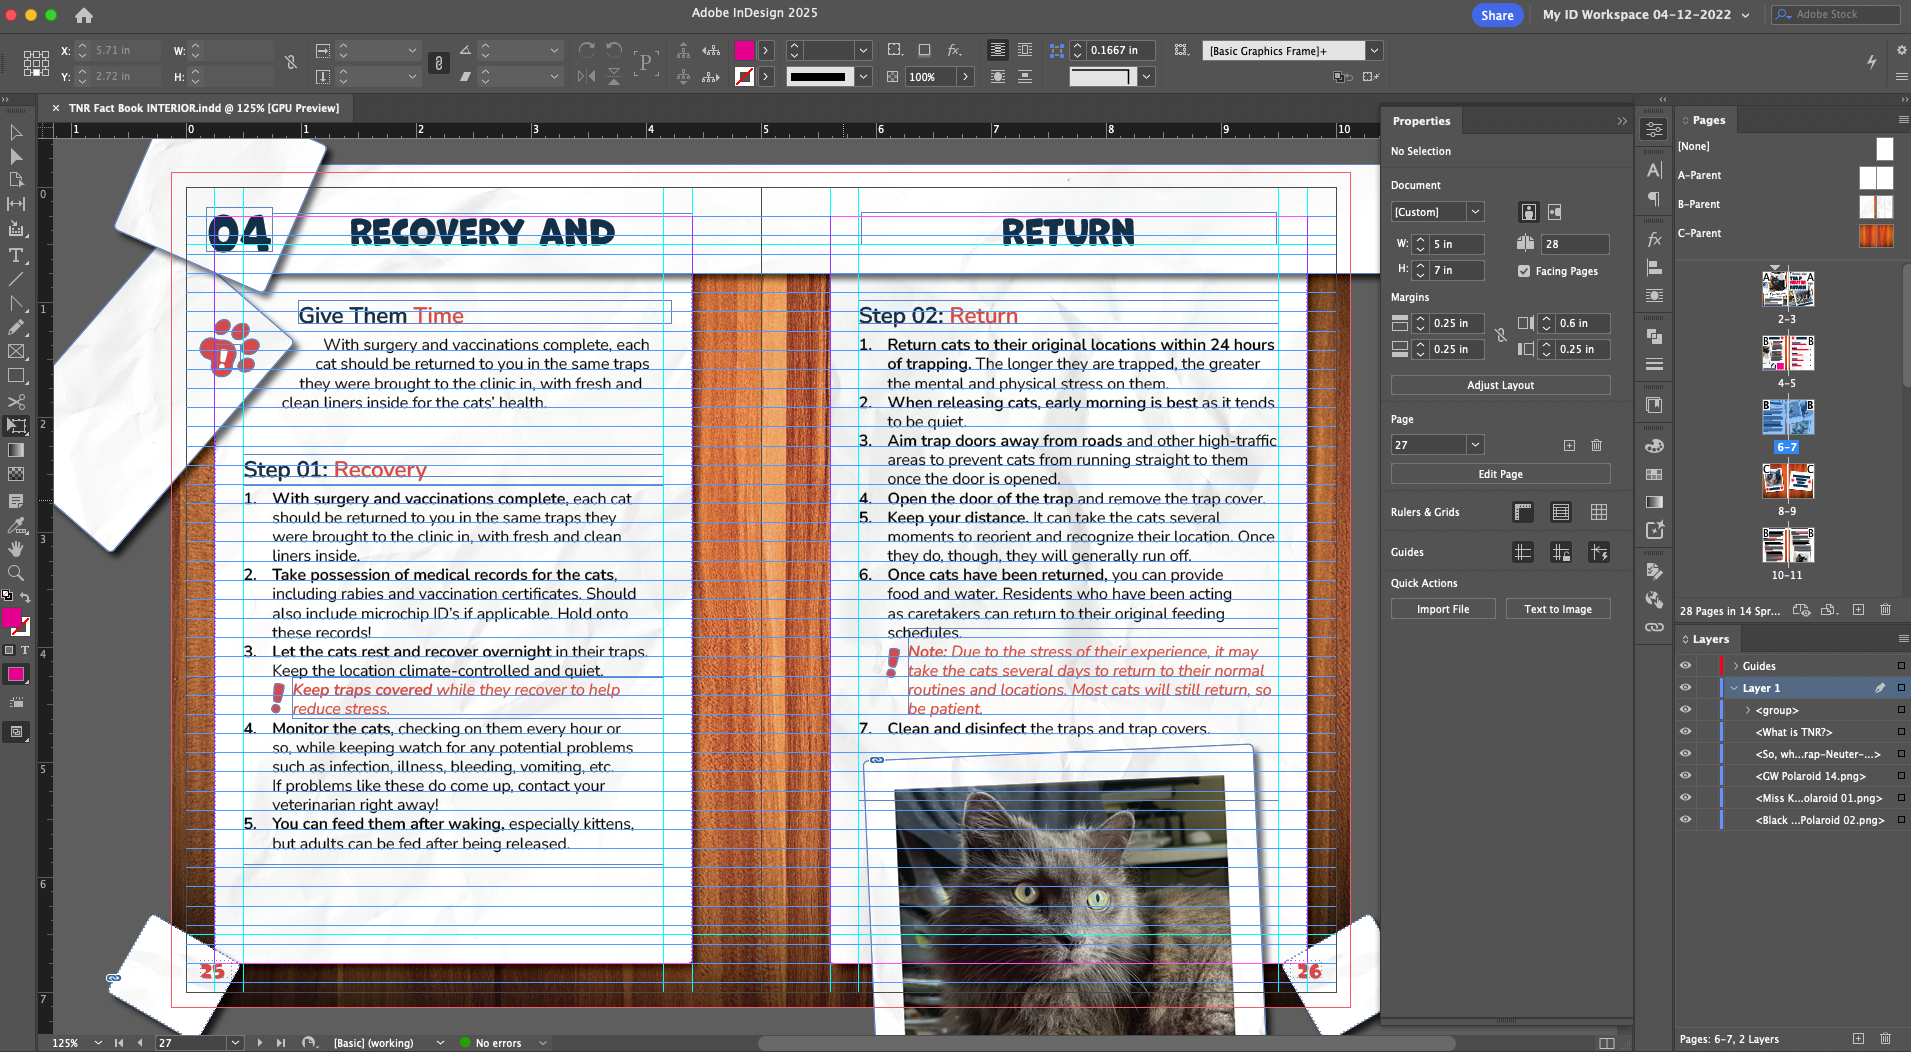
Next up was the interior page design and layout for the content of the book. Since the pages used the same layout and dimensions as the cover, I continued using the same document as the cover design for consistency and in preparation for printing. I used two Parent spreads for the main pages and the section dividers to make that task simpler going forward. From here I needed to tackle the textures and imagery, so I used Photoshop to prepare backdrops using the same textures I used for the polaroid templates to give the different elements a consistent look and feel to the front cover.
When working on the Welcome and Contents page spread, I realized that I didn’t like how the Contents page layout I had initially sketched translated to the fonts I was using in InDesign, forcing me to improvise to get to a layout I liked. I also discovered when writing out the Welcome page content that I had too much copy to be a simple welcoming message. Thus, I decided to make a dedicated spread for a detailed explanation of TNR before dividing the book into the different stages of the process.
From here I started working on the bulk of the content of the book: the different stages that make up the process of trap-neuter-return. The rough sketches I had originally created provided me with a good idea as to how to lay out the pages, but because I changed the theme of my deliverables to all match the polaroid theme, I needed to adjust my approach considerably. Thankfully I was still able to use the rough sketches to help me lay out where I would place different elements, like the overall paper backdrop and header elements that showcase what section the reader currently has the book open to.
Work continued on each page, spread, and section of the book. I used copies of one of the polaroids from the cover as placeholders as I went, with the intent to go back and fill these copies in later with unique polaroids once I was satisfied with the layout. At that point I went back into Photoshop to export many more unique images as polaroid templates for the book, plus these same images would also find use as assets for the other deliverables. With those set up, I replaced the copies throughout the book as needed, making any additional adjustments to placement as I went along.
It was at this point I recognized I had made a major mistake. Or rather, I had overlooked a major aspect of publication design: using the baseline grid to align text. I had forgotten at the beginning to use a baseline grid to align all the text for consistency throughout the book, and as a result the text came across as arbitrarily placed from one spread to the next. To fix this, I went back and adjusted all the text boxes to follow a baseline grid, requiring me to adjust spacing and placement of those text boxes and images. It was at this point, though, that I essentially finished the book the book and moved on to the next deliverable. It should be noted I did return to this book to make minor changes periodically after its initial completion, such as grammatical updates and the inclusion of a student project disclaimer page.

TNR Doorhanger
Meant to be paired with the TNR Fact Book, these doorhangers are informational flyers that recipients of this Tool Kit can place on the doors of homes in areas they may be planning their own TNR program. These door hangers provide context regarding TNR and a brief way to let residents know who will be conducting the program and who they should contact for any concerns, questions, or the desire to help make the program a success.
began with a writeup that would give me the copy necessary to place on the front and/or backs of the doorhanger, summarizing what TNR is and allowing for wording that introduces the organization. From there I took to sketching out a handful of thumbnails. Given that I wanted these door hangers to follow a similar design motif of the book, several of the thumbnails followed layouts that the book cover and interior did. Additionally, some were two-sided while others were just one-sided.
Liking sketches #10, #16, and #17 the most for their minimalist and clean styles, I created rough sketches of these to give more detail. I particularly liked #10 because it used a singular image of a cat cropped halfway down the center with the written content off to either side, using both sides of the card. In this approach the door hanger would separate the information regarding the organization conducting the program with facts regarding TNR by placing them on either side of the card. I could adjust this layout easily so that the cat photo could be replaced by polaroids instead.


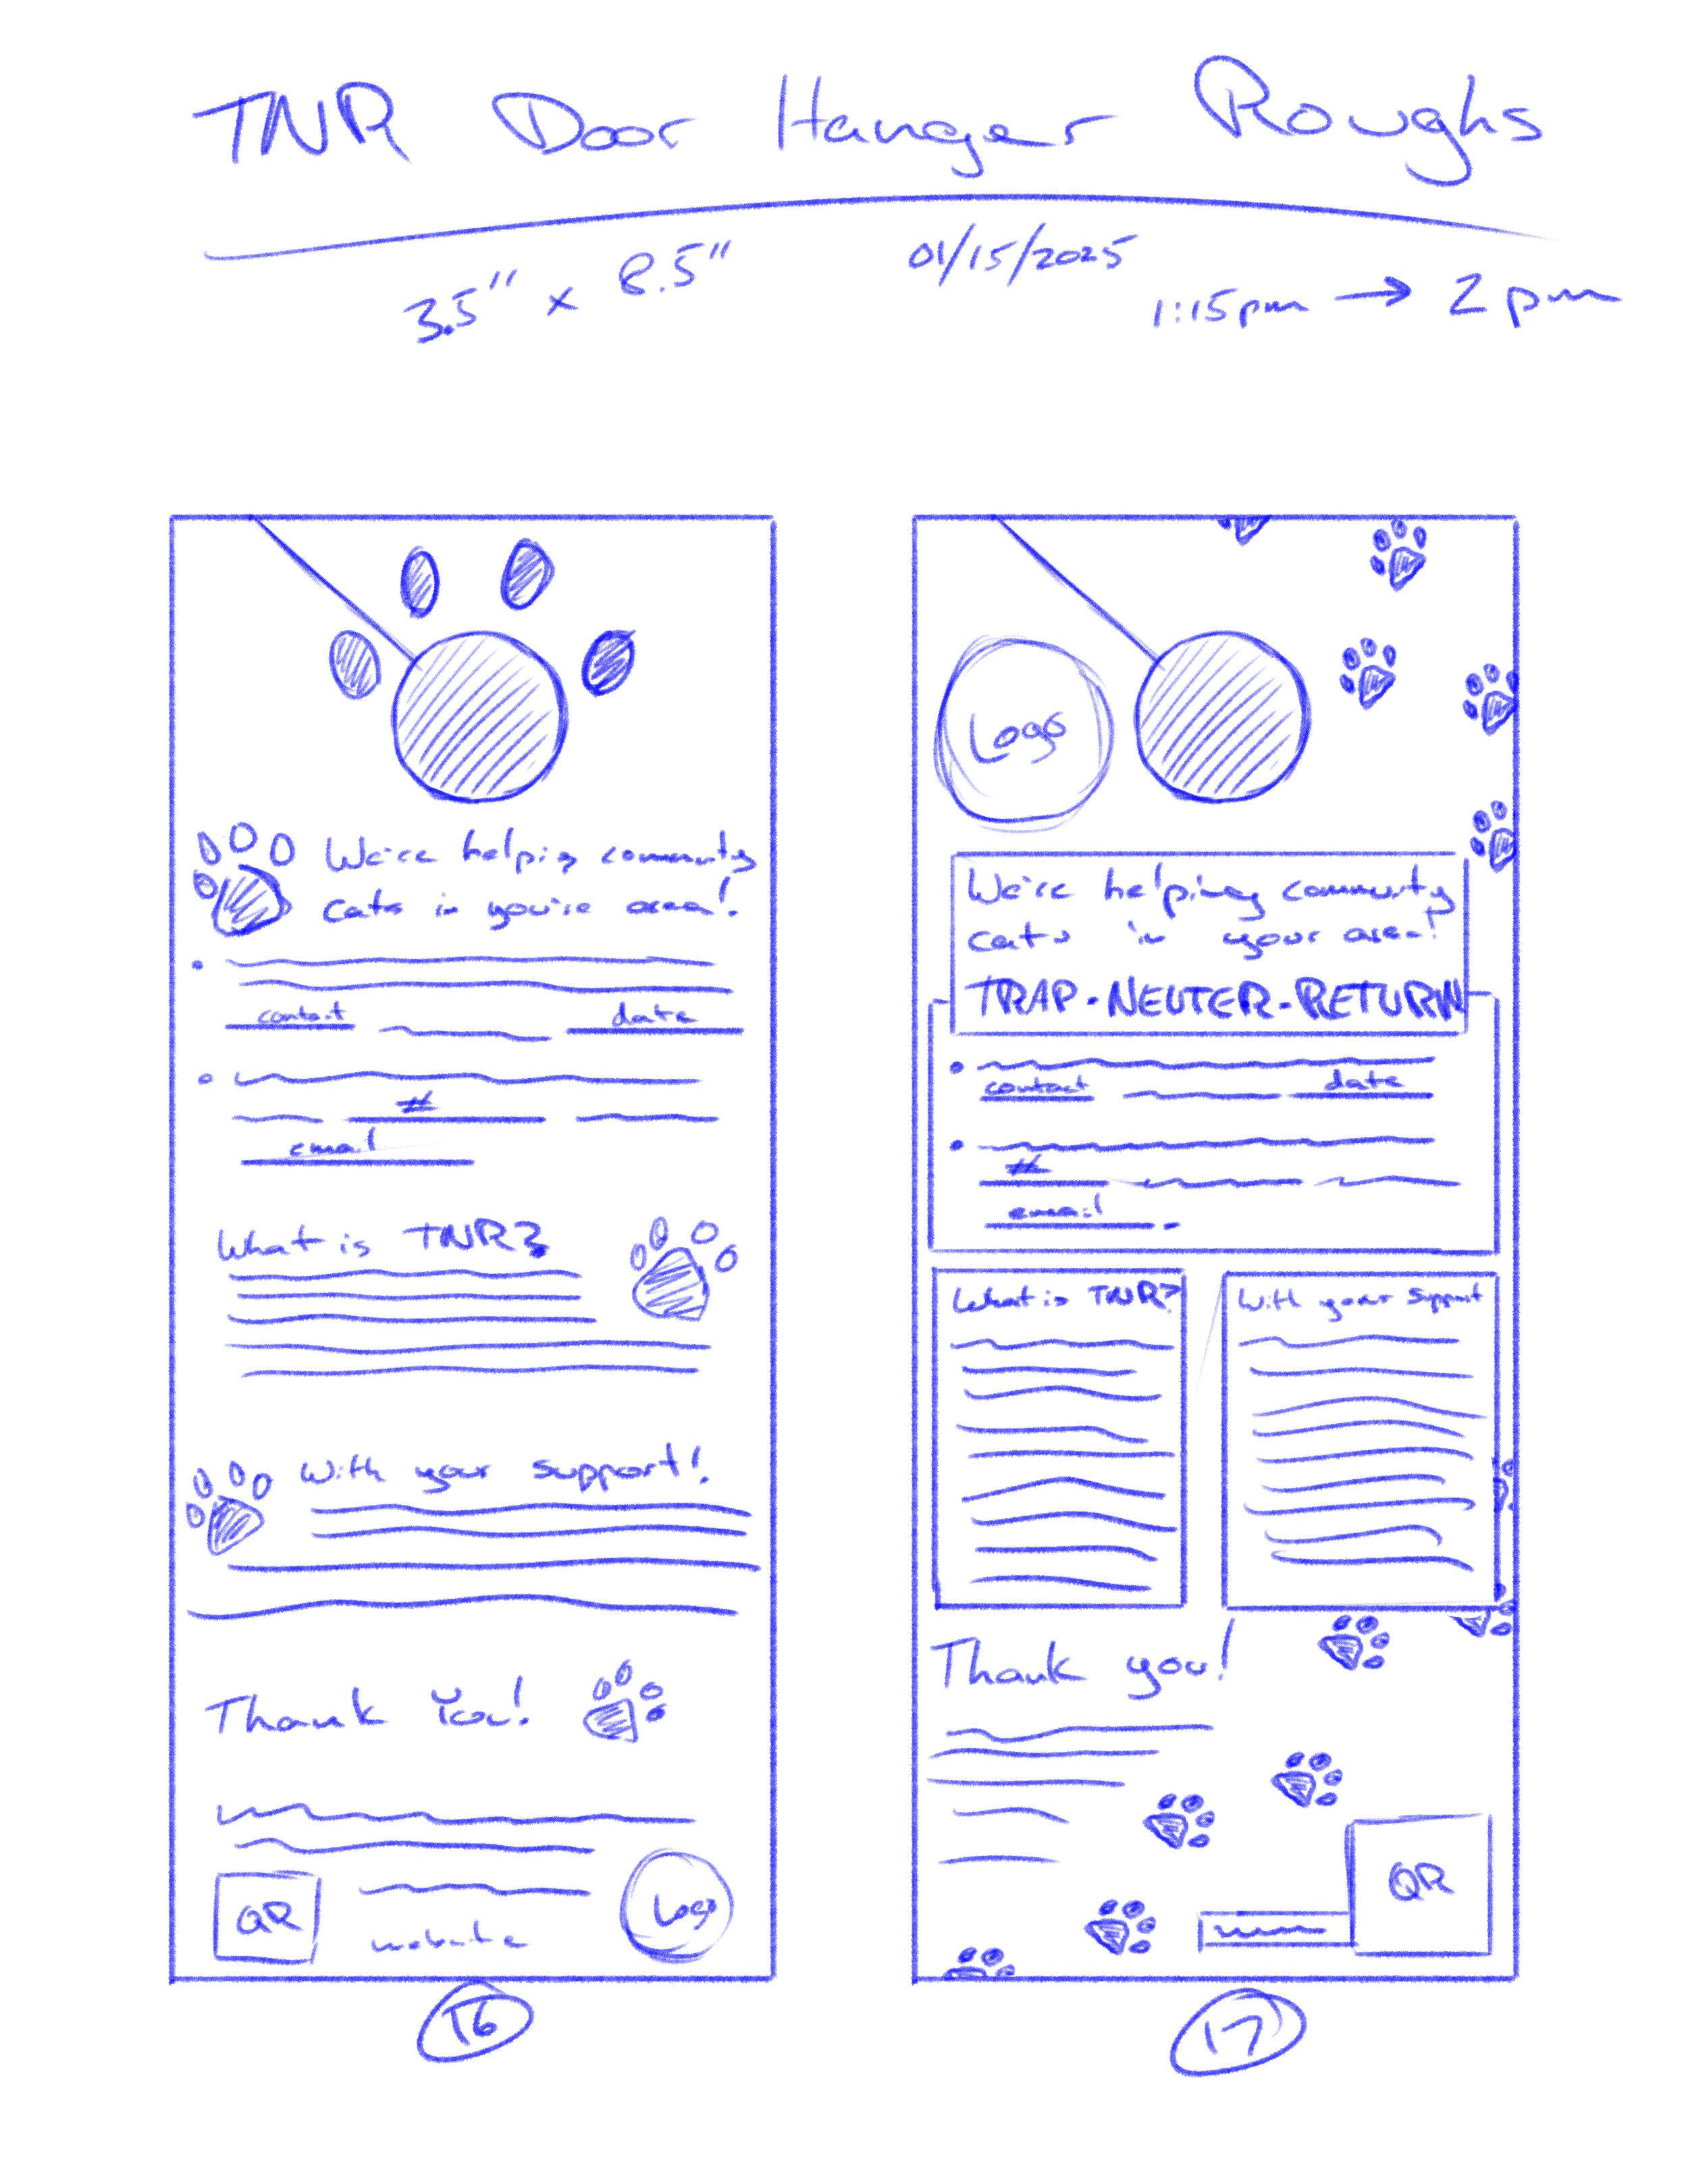
Since I had decided to use a consistent theme of polaroids throughout each deliverable in this Tool Kit, I adjusted the approach. Instead, I chose to place polaroids down the side of the doorhanger, and using the “backs” of polaroids for text placement (Fig. 72). I also used a template from a printing service that handles doorhangers to guide where I would place each element to make sure they wouldn’t be cropped by the hole in the top of the card. With that, the doorhangers were all set until I could get the website and QR code set up later.

Blinking & Clicking Posters
The book and doorhanger both addressed one side of shelter cat problems: the intake. These two posters, on the other hand, take a different approach. Dubbed “Blinking & Clicking,” the content is based on the research conducted previously in this thesis (See the Blinking & Clicking: Predictors and Strategies section on page 40 of this thesis). The main idea behind these posters is to offer shelters two strategies that could potentially help cats with behavioral issues, i.e. trust humans more and improve their adoption chances.
Before I could start laying out the posters, I needed to know exactly what each of them would say. Taking reference from the research conducted in Sussex and Oxfordshire, England, I developed a set of step-by-step guides that outline how shelter staff and volunteers can work with the cats using either the slow blinking strategy or the clicker training strategy. I broke down each of the steps involved in their studies to develop the written content for these posters, which influenced the thumbnails and roughs that follow.
Once I had a solid idea of what written content was meant to go on the posters, it was time to start sketching out ideas, first as thumbnails and then later as roughs once I had a few ideas that I found satisfactory.


As A3 is a common size for printing and online mockups, I went with that size for my poster designs, using InDesign for layout of the content. I placed the rough sketches on each page to act as a guide for object and asset placement, then polaroids were placed within the layout .
As I started placing the images and adding text, I encountered an immediate problem: it was too much content! Everything I had come up with for these posters was far too much and needed to be severely condensed, forcing me to rework the written content and pare it down for the posters. I decided the original written content would go into the resource website instead. I went back to InDesign and started placing the text, adjusting and continuing to condense the wording as needed while making sure it all still made sense. I left some spaces for the simple illustrations I planned to add for each step as well.


Once the layout was set up for each poster, I moved into Photoshop to sketch out the illustrations for the steps involved in each strategy. I decided to use inking brushes to complete these illustrations since I wanted a natural and organic feel to the drawings. I often struggle to get that kind of natural feel when it comes to vector graphics in Illustrator, so I did them freehand in Photoshop (Fig. 75 and 76).
With the inked illustrations completed, I moved them to InDesign as PNG images with transparent backgrounds. I wanted the paper texture behind them to show through for the tactile look and feel as if they were drawn directly on that paper to add to that traditional, nostalgic feel. Of course, I noticed as soon as I did this that there was a problem with my line drawings: the lines were far too thin when I scaled them to fit the spots they were meant to go. I could hardly see them when scaled down. More than a little frustrated, I jumped back over to Photoshop and completely re-inked the sketches using a much larger brush size to get the desired effect. Thankfully that seemed to do the trick.


Adoption Risks Trifold
The next deliverable for the tool kit that also address cats currently within shelters is the trifold designed to be an informational piece that can be given to new volunteers and staff as a way of informing them what factors they should look out for and actively attempt to combat when it comes to adoption risks.
First, I needed the written content before I could start sketching or coming up with ideas. From the research conducted previously, I determined that the main risk factors that hinder a cat’s chances for adoption include coat color (black cats especially are at risk), age (older cats have a harder time finding homes), breed (unique breeds are adopted more quickly), and behavior (friendly cats are adopted more quickly than aggressive or timid cats). To that end, each panel in the trifold will be dedicated to one of these factors, alongside a cover panel and a back cover panel that offers a call to action.
I started sketching out a range of ideas, ending up with 20 different options in total. In some of them I made use of basic shapes and lines, while others made use of cat-related icons or shapes. In all of them I felt that the use of paw prints to make up the bullet lists that will be written out on each panel would be an appropriate accent to the content as well. Of these sketches, the ones that stood out to me most were #6 for its unique use of circles to frame photographs, #15 for continuing the polaroid theme, and #17 for using simple by clean rounded rectangles to frame photographs and the panel section headers.
I expanded upon these ideas in greater detail in my rough sketches, making notes of how I wanted each of the panels to look and what the photos framed on each panel should include. While I found myself happy with each of the three options, I could finally see the overall theme of the content in this Shelter Cat Advocacy Tool Kit taking shape in the form of the polaroids.


The company I found to print these offered simple templates using US Letter sized documents, which is what I based my InDesign template on. As with the posters, I placed the rough sketches for the trifold into the document, using them as a reference while I worked. Once again, I found my plan was off, which was starting to frustrate me. This time I did not plan on how I would handle the background of the trifold and had not considered that the wood texture I used would be far too busy for me to place text on it without it getting lost. Thankfully my solution was simple: use backdrops in the form of paper or polaroid backs like the previous designs had done.
Later in the proccess, I discovered that the copy I’d written for this was too lengthy again, forcing me to condense the text somewhat in a few areas. With the text and images placed, I spent the next hour making minor adjustments to spacing and positioning, aiming for a clean and easy to ready trifold that was pleasing to the eyes. I also replaced several of the polaroids as I worked, making sure the trifold contained a variety of images appropriate to each topic and page.


Branded Gear
Last in the list of physical deliverables was the selection of branded gear for people and cats, as well as the tote bag. Many of the items considered part of the branded gear do not actually require additional designing, because these items are going to make use of the brand’s logo design. Specifically, the t-shirt, mug, pens, and tote bag will display the logo front and center, while the socks will make use of a repeatable pattern with the brand’s logo placed within it. This just leaves the branded items for cats.
First, I need to describe some of the difficulties I encountered with my intention to create branded cat gear. Gear for humans—such as shirts, mugs, magnets, etc.—is easy to find online and for the most part relatively cheap to print. However, customized cat gear is surprisingly difficult to find outside of having a cat’s name printed on a collar, and those places that do offer custom printing options are incredibly expensive or require a minimum print count. Additionally, I discovered a lack of quality mockup templates online for pet-based content. As such, for the sake of this thesis, I need to find alternatives to these problems.
Since I am confident in my photomanipulation skills using Adobe Photoshop, I decided to make my own mockups. I began this process by going to stores in my area to see what kinds of toys and items for cats were for sale. I found a lot of options that used strangely shaped packaging that would require too much time to manipulate in Photoshop. It wasn’t until I went to a small, out of the way grocery store that I found a set of cat gear that used simple but effective packaging that would be perfect to use as mockup templates. I purchased the items and brought them home, taking a ruler and measuring each so I could generate templates in Photoshop.
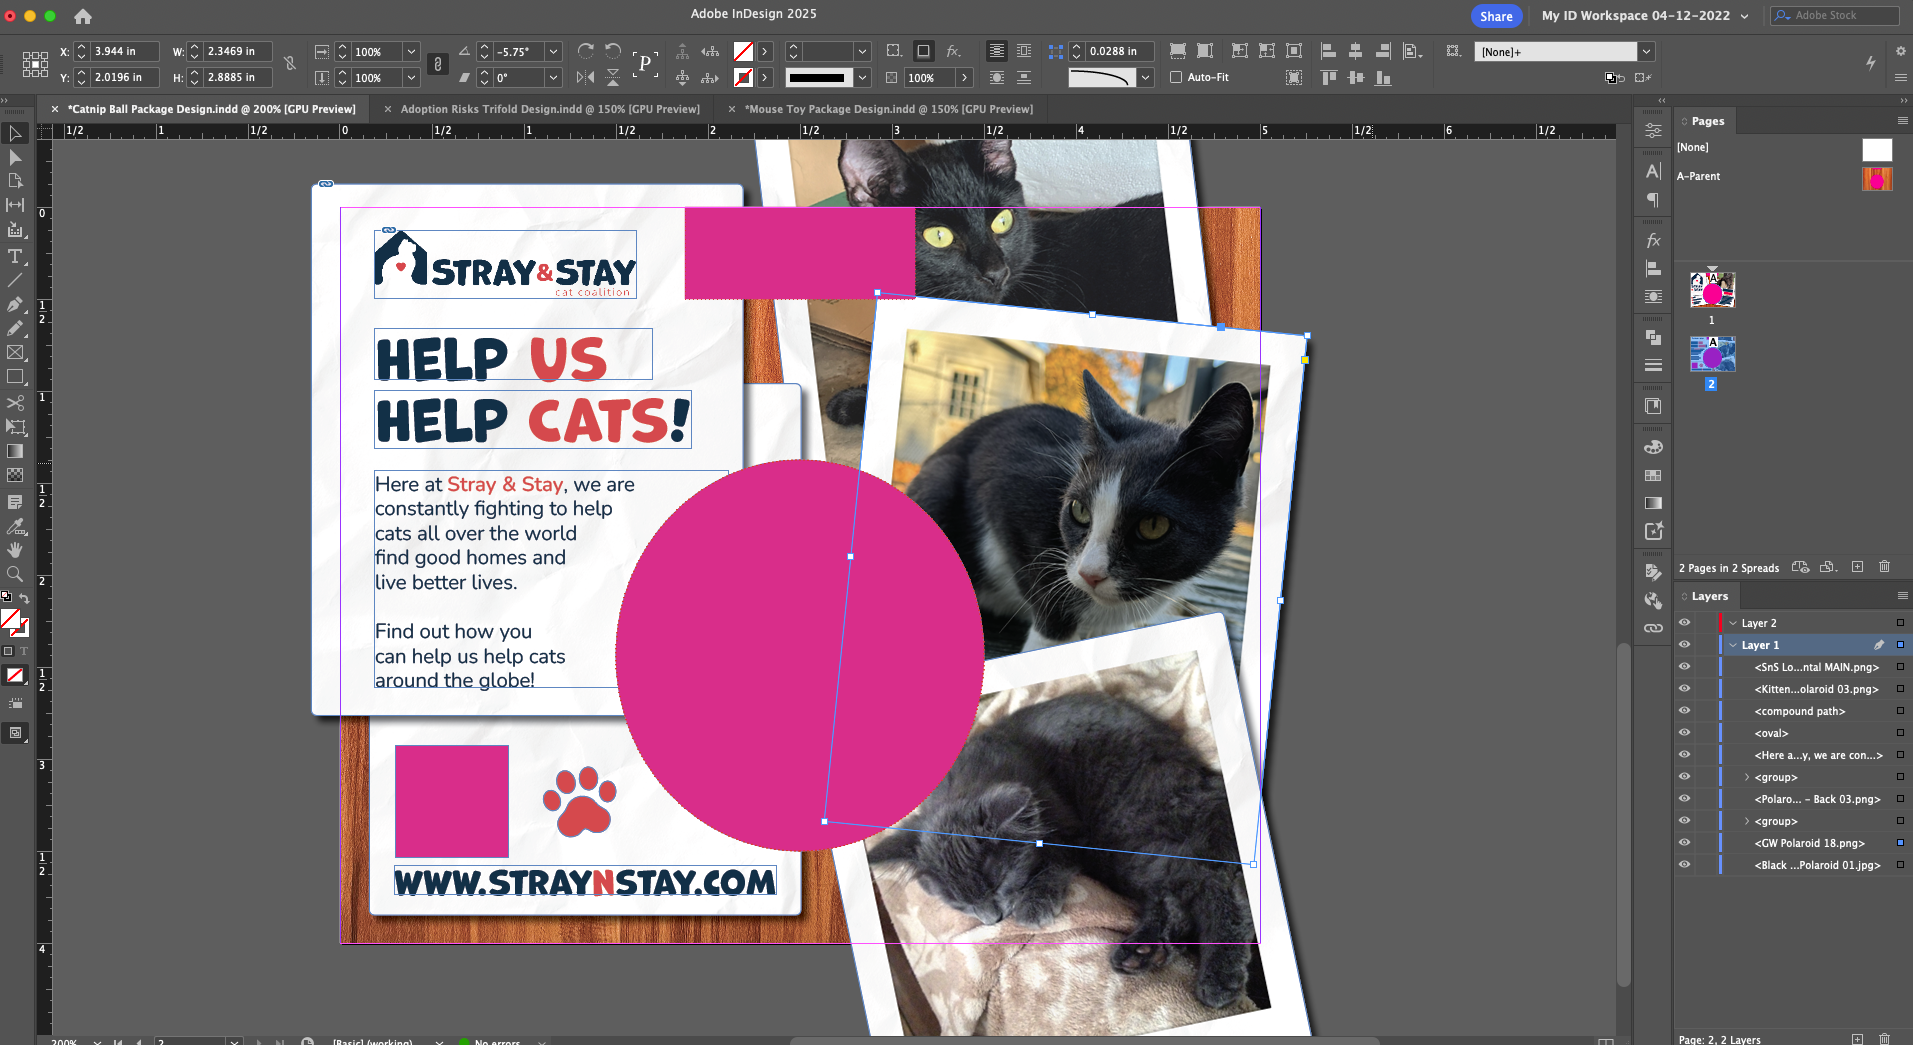
I sketched a set of templates in Photoshop that I used to frame each thumbnail sketch, making sure to keep to the proper dimensions for each product. I came up with 12 sets of thumbnails, making sure that I created packaging for each item that matched each other in each set to make it known that they are part of that set, as well as part of the Tool Kit by this brand. Some made use of simple shapes while others utilize photographs or cat iconography. Given the limited space on these small package labels, I couldn’t fit a lot of information other than details about the item itself as well as a simple call to action to encourage people to find out more. It was in doing this, though, that I came up with a simple and short tagline for the brand: “Help Us Help Cats!” In other words, if people help the brand by donating money or time, they in turn help cats because they are helping the brand do what it is meant to do. This is also short and simple, making it easy to remember while taking up little space on such small packaging labels. After I completed my thumbnail sketches, I found myself liking #1 and #7 the best.
With a simple tagline in mind and the two thumbnail sets that I liked, I used Photoshop to create rough sketches of those two sets. Both make use of simple shapes for the titles and information. #1, though, uses a photograph of a cat as the most prominent asset for the back labels and #7 uses cat-based icons to accent the written content. At this stage I was still not certain which of these I would choose as I felt the design would depend entirely on which theme I decide on going forward.


Satisfied with the ideas I had come up with, it was time to start designing. First, though, I wanted to set up mockups for use in the final visual solution, so I created my own using the previously purchased gear. I set up a simple photoshoot in my basement to take photos of these items, and even had help from my cat, Rocky. About halfway through the shoot, though, he decided to take a swipe at me through the sheet I was using as a backdrop and ended up knocking everything on the floor. Unfortunately for him, I had to put Rocky upstairs and close the door to keep him from “helping” further. The rest of the photoshoot went by without a problem and I was able to collect several quality shots. With the photographs in-hand, I brought them into Photoshop to create the templates to use for the mockups, creating masks and setting up smart objects that I could later edit and place the designs.


I then moved to InDesign and created the packaging labels I would place into those mockups. It had occurred to me that while my initial sketches were fine, they did not follow the polaroid theme, requiring me to change my approach for these labels to emulate the look of the previously created content. I did, however, use the rough sketches as a guide for placement of text and visual content, meaning my previous planning wasn’t a waste. After completing each of the designs, I moved them into Photoshop and worked on fitting each design into their associated mockups, making sure that each design fit properly. The measurements I had taken in the initial stages seemed to have been accurate, as I found the designs I created to fit perfectly well once placed in the mockups I created (see Chapter 4).


The final piece of the physical deliverables is the repeatable pattern. This design was meant to round out the final elements of the branded gear to be printed or utilized in a variety of ways. I decided it would be beneficial to use the logo I already created and place it with other elements that have shown up regularly through my design process, such as paw prints and the heart from the logo itself. After some trial and error positioning each element, I finally landed on a good design. Now this pattern can be applied to all manner of items, from socks to blankets to bandanas and more going forward.


Resource Website
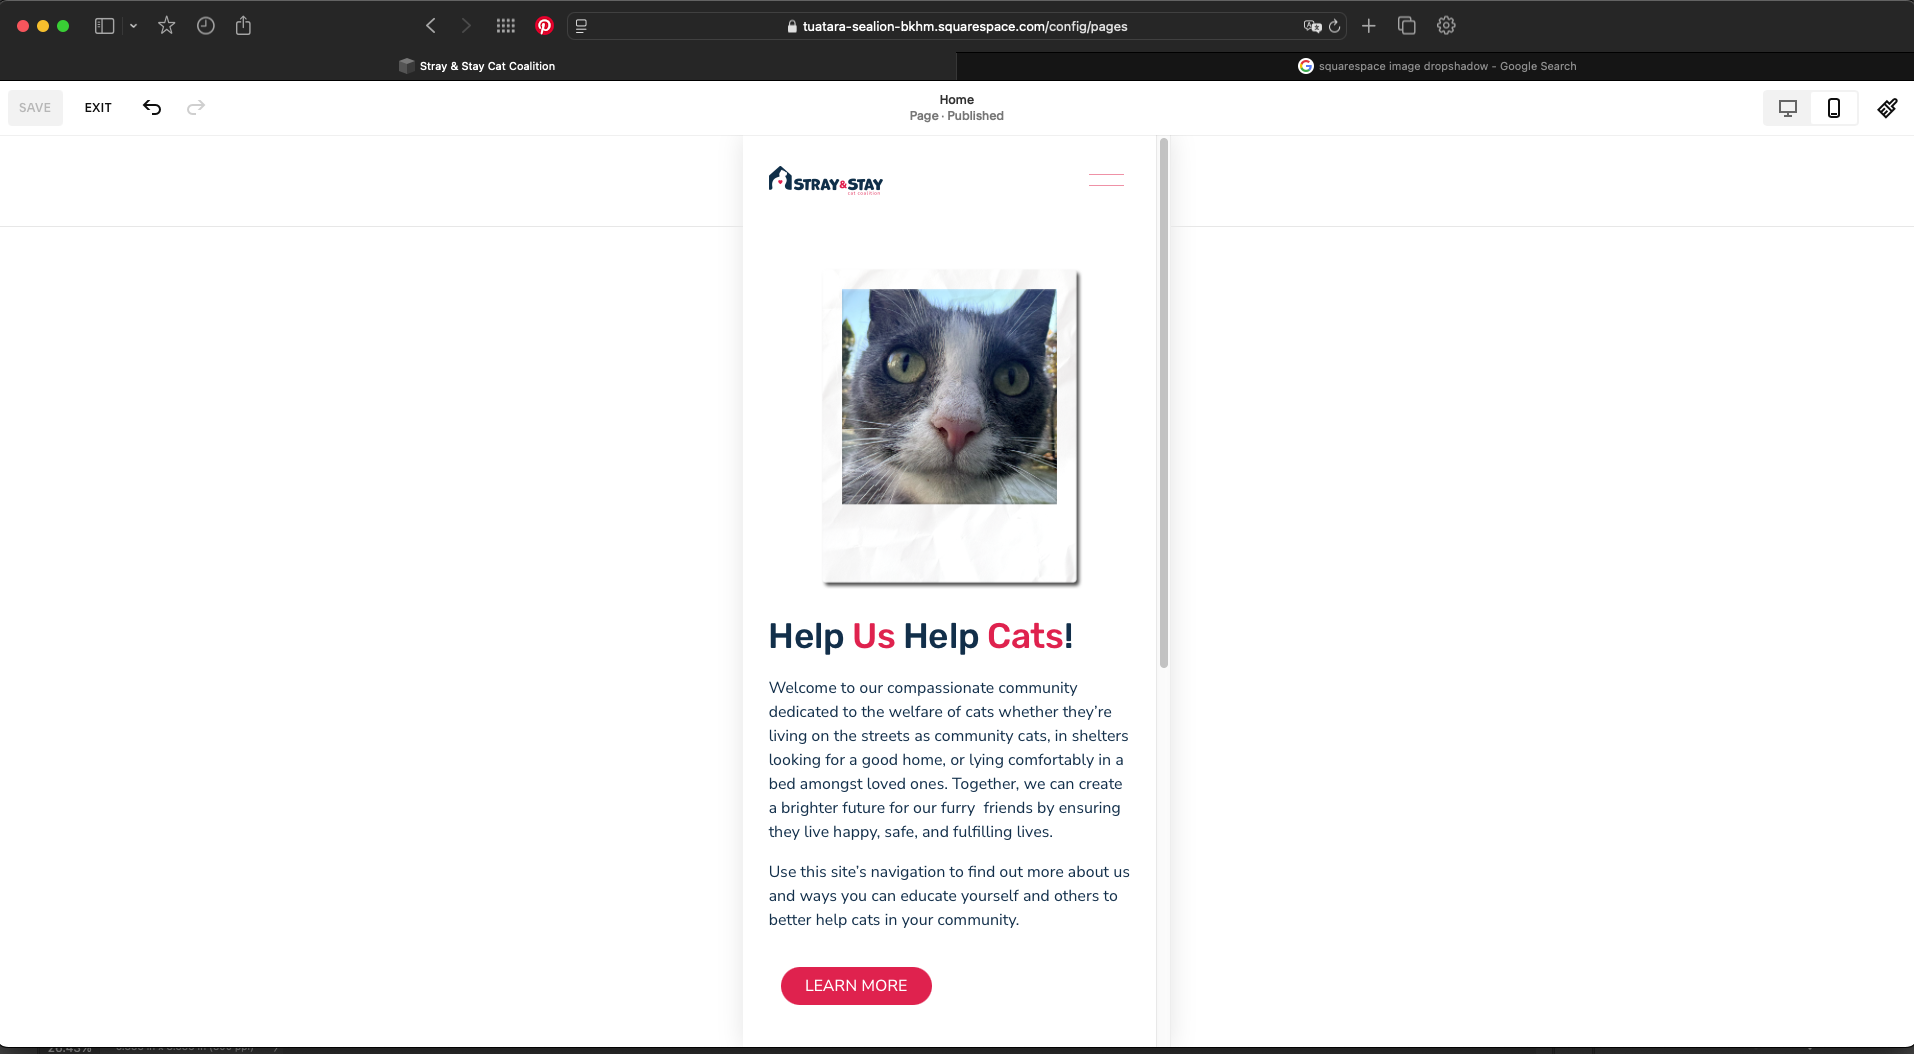
As the final piece to tie everything in the Shelter Cat Advocacy Tool Kit together, the Resource Website is meant to be a place where the information held within each deliverable within the Tool Kit can be found. In some cases, that information can also be viewed in greater detail than the printed versions could hold. I began my work using Squarespace due to some familiarity with the platform, though it had been years since I last used their services and many of the features had drastically changed from what I remember.
Since I’m not a front-end developer and not wholly familiar with HTML/CSS, I was forced to rely on Squarespace’s site preview and editing tool to create my website. Their Blueprint AI tool offered me customizable suggestions for what to place on each page in the site. Unfortunately, I found most of its suggestions unhelpful since none of what it offered specifically addressed the information-based website I was trying to create. As a result, I ended up putting together each page of the site manually.
Starting with the home page I ran into an issue I had not anticipated: Squarespace does not have a tool that allows me to create drop shadows on images or objects placed on a page. This meant the polaroids I intended to use for much of the imagery would get lost against the bright white background, forcing me to find a workaround. Fortunately, it was a simple, albeit tedious, workaround. I moved back into Photoshop and adjusted the polaroid templates I had created for the print deliverables originally. Saving the templates as new “drop shadow” Photoshop documents, I added the shadows to every polaroid image I had created thus far, then exporting them in PNG format to retain their transparent backgrounds for ease of use. This approach did the trick for the shadow effect I wanted.

At this stage in the website’s development, I also knew I needed to make the site mobile friendly, and Squarespace’s development tools include a mobile device view, allowing me to place the content of the page as if it were to be viewed on smart phone. The content was already in place but required some repositioning to fit properly and follow appropriate hierarchy and aesthetics. With the home screen finalized, I moved on to the About page, where I added a brief description of what the hypothetical brand is all about. I also included a series of polaroid photos with drop shadows on them to give the page more interest. As with the home page, I also moved to the mobile device view and readjusted the contents appropriately. This page was simple and straightforward, so I moved on to the most content-heavy portion of the site.
The Trap-Neuter-Return page contains the greatest amount of information because it explains the entirety of the content found in the TNR Fact Book & Guide with a measure of additional details. This is where I began to face a real challenge. It wasn’t a design challenge, but rather one of patience. Due to the sheer amount of content, the further along in the process I got, the slower Squarespace’s interface became. I encountered a significant amount of lag between placing, editing, and adjusting content, making this a slow process. What should have taken me thirty minutes to an hour ended up taking over three. I was frustrated and had to step back for a few minutes before returning.

Once I was in a better mindset, I worked on the remaining pages, including the Adoption Risks, Blinking & Clicking, and Downloads pages. I initially considered placing Adoption Risks and Blinking & Clicking on the same page since they are interrelated. However, I felt doing so would bog down the pages with information and decided to separate them, especially as I considered the slowness of the TNR page. Of course, separating them also allowed me to create unique QR codes for the posters and the trifold. Finally, I worked on the Downloads page, where I placed PDF downloads of all the print items found inside the Shelter Cat Advocacy Tool Kit. Unfortunately, though, I discovered that the PDF downloads didn’t work as anticipated. Instead, the downloads only opened into black, empty pages when testing the site, making those links useless. Unable to find a workaround, I reached out to Squarespace’s support team for assistance, where I was informed the links would work just fine once I paid for a month-long or year-long subscription to keep the website live and published. Until then, those links would not work since it required much of the company’s server resources to maintain. Once I made the site live later on, though, the download links worked as intended. The next day, I noticed the static, vertically placed Polaroids looked dull. Since Squarespace doesn’t allow content rotation, I used Photoshop instead, creating a template to adjust each image’s angle. After some trial and error, I replaced the originals, dramatically improving the site’s flow and appearance.

The Process Wrap-Up
From the beginning of this process to the end, I found myself facing multiple challenges that ranged from intellectual to aesthetic to technical. Ideation and planning had always been a weak point of mine, which is why I spent such a significant amount of time working on brainstorming and thumbnails in hopes of staving off as many problems as I could. I feel that for the most part this worked out well in my favor as I was able to hit the ground running when it came time to develop and design each element of the visual solution. During the design process I faced further challenges as I found many of the sketches and planning I had originally done didn’t quite meet my own expectations. Some of the copy I created was too much or too little, and many of the designs I sketched simply didn’t work the way I had intended. Additionally, several times I fell victim to the problems of technology or issues outside my own control. I spent far too much time combating software issues and even coping with my family’s cat, Rocky’s, “help” from time to time. Despite the problems I encountered throughout the process, the planning and my ideas pushed me forward and help guide me towards the designs of my final visual solution. In the next chapter I will be discussing the results of all my efforts and the reasoning behind each decision I made during the development of this Tool Kit.